
Lo que conviene saber sobre el mundo de Squarespace.
Para diseñadores, desarrolladores y personas que crean negocios en torno a Squarespace.
How to migrate your store from Squarespace to Shopify
How to migrate products from Squarespace to Shopify
Exporting steps
The first thing you need to do is export your data from Squarespace. Don’t forget to keep your Squarespace site live whilst completing this step. In the Home Menu, click Settings.
Click Advanced, and then click Import/Export.
Click Export.
Select Products from the Export Site menu.
Click Download. Your products will download as a products.csv file.
So easy, right?
Importing steps
There is a whole bunch of ways how to get your products imported, whether it’s through an automated service offered on the app store, or manually entering small product catalogs.
Without further ado, here is a guide on how to import your Squarespace .csv product file to Shopify:
Steps:
1. Go to your Shopify admin and choose Products tab.
2.Click Import.
3. Click Choose File in the Import products by CSV file window.
Locate your CSV file, then click Open.
Click Upload file.
A confirmation letter from Shopify will be sent to your email address as soon as your CSV file is uploaded.
How to migrate blog content from Squarespace to Shopify
Exporting
I am pretty sure the next stop you will want to do is export the content from your website including blogs, text and image blocks, and pages.
You are welcome to use our guide below.
1. In the Home Menu on Squarespace, click Settings.
2. Click Advanced, and then click Import / Export.
3. Click Export.
4. Click the WordPress icon.
Note: Click this icon even though you are going from Squarespace to Shopify, not Wordpress.
5. If you have more than one Blog Page on your site, a “Select Primary Blog” message will appear. Only one Blog Page can be exported.
6. Select a Primary Blog from the drop-down menu, and then click Export.
7. Wait for the export to process, which may take you to wait for a few minutes.
8. Download the exported file.
9. When the export is complete, a Download option will appear. Click Download to save the .xml file to your computer, or click Clear to erase the export.
Importing
For Shopify Plus members there is a possibility to use the Transpoprter App and comm and-line tool to import their content into Shopify.
First thing you need to do is decide the way you will migrate your content and in what order. You have a few options here :
1. Copy-paste your content from your old site.
2. Use existing migration apps from the Shopify App store.
3. Develop an app that uses the Admin API.
4. Migrate your content manually with the help of CSV files.
How to choose a Shopify theme
Creating a custom theme for Shopify, thanks to which your online store will stand out from the mass of competitors, is a responsible task as the visual representation of your business is of great importance.
We recommend using search and filtering options for this aim.
There is an option to search by theme feature, which you can find with the help of the top bar search field on Shopify Theme Store, for example product filtering, video, related products, etc.
You can also search by collection to be able to discover themes with a desired style or layout, or by industry. In order to do that you need to go to the Shopify Theme Store. Click “Collections” or “Industries”, and then select a category.
How to switch your domain
The main condition is that your Squarespace domain has been registered for at least 60 days. Then, the transfer can happen.
Step 1 - Unlock the domain
In the Home Menu, click Settings, and then click Domains. You can also press the key while any panel is open and search domains.
Click the domain you want to transfer.
Scroll down and uncheck Lock Domain.
Step 2 - Get transfer key
The Get Transfer Key button will appear at the bottom of the panel after unlocking the domain. Click Get Transfer Key and copy the transfer key that appears. You'll provide this code to your new domain provider to authorize the transfer. Your provider may also call this an “EPP code” or "authorization code."
Step 3 - Transfer the domain
To transfer your domain away from Squarespace, send your new domain provider the transfer key you just copied.
Steps:
From your Shopify admin, click Online Store > Domains.
If this is the first domain that you're connecting to your Shopify store, then click Connect existing domain, then click transfer in your domain:
If you already have a domain connected to your Shopify store, then click Transfer domain:
Enter the domain that you want to transfer to Shopify. Do not include www. at the beginning of the domain.
Click Next.
Click Verify domain.
If the domain is ready to be transferred, you see DOMAIN UNLOCKED. Click Next to continue.
In the Verification code box, enter the authorization code, or EPP code, that your domain provider gave you.
Click Next.
Click Buy and transfer.
Check the email account associated with your domain for an email from your domain provider. The email varies by domain provider, but you need to approve the domain transfer by clicking a link such as Confirm Transfer or Approve Transfer:
After you've approved the domain transfer, it takes up to 20 days for the transfer to be complete. You will receive an email from Shopify confirming that your domain is transferred.
How to redirect your urls for SEO
When migrating from a Squarespace store, you don’t want to lose any of the website features or links. You would want to minimize or avoid the loss of SEO ranking from the page changes.
This is how you can manage your redirects:
Make sure to backup everything.
Find your sitemap on Squarespace.
Convert it to a CSV and download.
Upload the file to Google Sheets (to make it safe).
Create the SEO redirects.
You have 3 courses of action:
Forward it to the same page on the new site, i.e About Page to About Page, Red Shirt to Red Shirt
Combine it with another page. This is just like forwarding it to the same page, but maybe you combined your About Us and Contact Page, or you no longer have Hoodies but you still have Sweaters. Just send it to the most similar page.
Send it to the homepage. Do not ignore it or else it will give a 404 error. As we stated, Google hates 404s and it will negatively impact your SEO ranking.
Tools you can use to automate the process
There is a whole lot of various tools which contribute to automating the migration project.
Spare some time to review some of the tools we recommend, they are definitely worth your critical eye.
1) Litextension. This tool provides you with a high level of security and accuracy while transferring your Squarespace store to Shopify. A few minutes – and the connection between the two carts is established.
2) Cart2Cart is another time and energy-saving service you should consider. In just 3 steps the transfer is completed and your nerves are preserved.
By and large, if you aim at creating an internationally acknowledged online store and attract traffic from other countries, Shopify will be a good tool for implementing a plan to reach the western world and fulfill your wildest dreams!
Auto Export Squarespace Orders to Google Sheet
If you’ve ever wanted to do something with your orders API but didn’t know how, there’s a tool called Parabola that let’s you do fun things like automatically export orders to a Google sheet.
This is popular request because frankly, exporting orders manually then uploaded them daily or even weekly is a pain.
So I decided to give Parabola a try and do a video on how it’s done.
You can also use this example to get started.
See the settings below.
API Import Settings for Parabola.
API Endpoint url - Check here for the latest version.
Authentication - Bearer Token
Bearer Token - Orders API key
Paginaton key - nextPageCursor
Cursor key - pagination.nextPageUrl
Top level key - result
Squarespace Fluid Engine - What you need to know!
In this review we’ll look at what the new Fluid Engine editor has to offer, how users are responding and how to use it.
What is Squarespace’s Fluid Engine?
Fluid Engine is Squarespace’s latest layout editor for blocks and page sections. Released July 21st, 2022. Squarespace users can now move, layer, and arrange content blocks on a grid. Fluid Engine also allows you to edit your Mobile view separate from Desktop.
Why the change?
Good question.
According to Anthony Casalena, Squarespace CEO & Founder,
"Fluid Engine improves both the usability and expressibility of our system, making it possible for more of our customers to access a wider variety of designs. Whether you are a professional designer building on Squarespace or just starting out, Fluid Engine helps our customers achieve a variety of fantastic design outcomes without having to resort to custom code."
If you’ve used Squarespace for a long time, you’ve probably gotten used to its quirks. But for a lot of customers, navigating the 12-column-based editor was the biggest hurdle.
You often needed to get creative and use spacer blocks to get your layout how you want it. If you wanted to do anything more complex you needed custom code or plugins.
Other platforms allow you to edit the mobile version of your site and now Squarespace offers the same functionality to its users.
How does Fluid Engine work?
Fluid engine is only available with Squarespace 7.1. It works the same way you’d expect your typical WYSIWYG editor to work. It’s based on a grid system that allows you to drag, drop, overlay and resize elements like you can in Canva.
The grid appears when you drag elements or when you press G on your keyboard.
Fluid Engine does NOT work on the following site elements.
Blog posts
Eventos
Product descriptions and additional information
Block sections created before Fluid Engine
Squarespace Emails
Mobile App
What’s the difference between Fluid Engine and Classic Editor (Layout Engine)?
Key Features of Fluid Engine
Layer overlapping blocks
Edit mobile layouts independently from desktop layouts
Full bleed sections
Block background colors for text blocks
Images that can fill their container
Images can be aligned in the container
Select multiple images
What’s missing
Image block layouts
Image block animations
Fluid Engine Pro’s and Con’s (Community Reactions)
In lieu of a camera and a microphone, I traveled around the social web to get a sense of how people are feeling about the new Squarespace Fluid Engine Editor.
Who cares? We do. The people who build websites on this platform everyday.
For us it’s a tool that’s become an integral part of our livelihood. We struggle with it, we recommend it to clients, we support it.
Squarespace has been a leading trendsetter in how the web looks and feels and so we’re keen to see how this next evolution with Fluid Engine affects that.
The Biggest Pro
Way less need for custom code.
The Biggest Con
More time on the mobile layout and no tablet view editor.
How to use Squarespace Fluid Engine
How to add a Fluid Engine section
Adding sections hasn’t changed but the default section layouts have been updated.
How to edit the grid

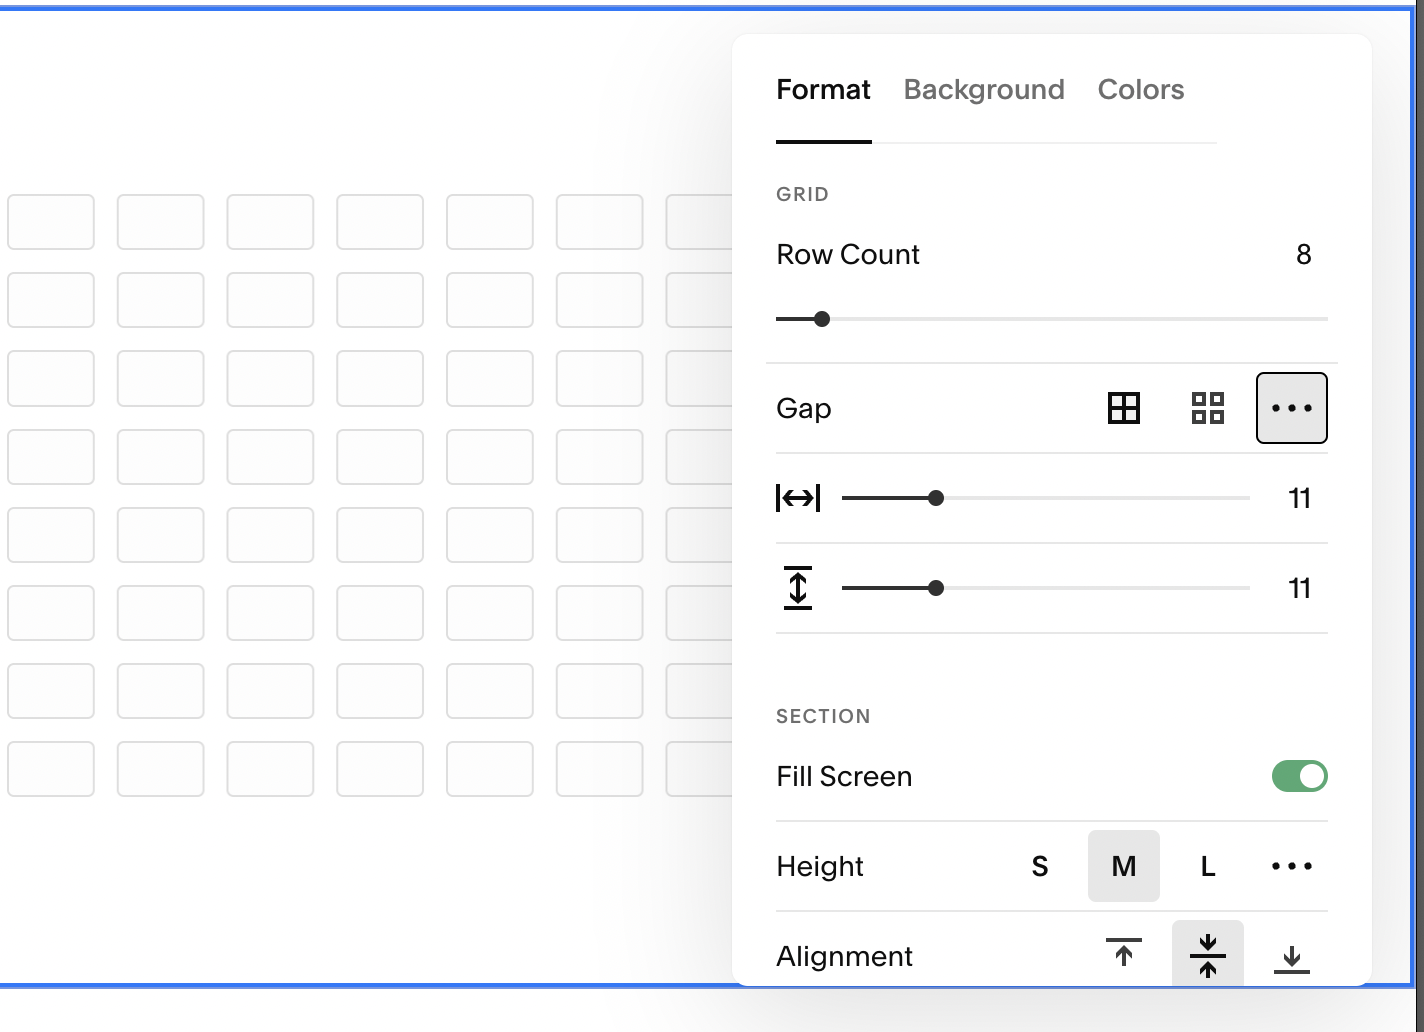
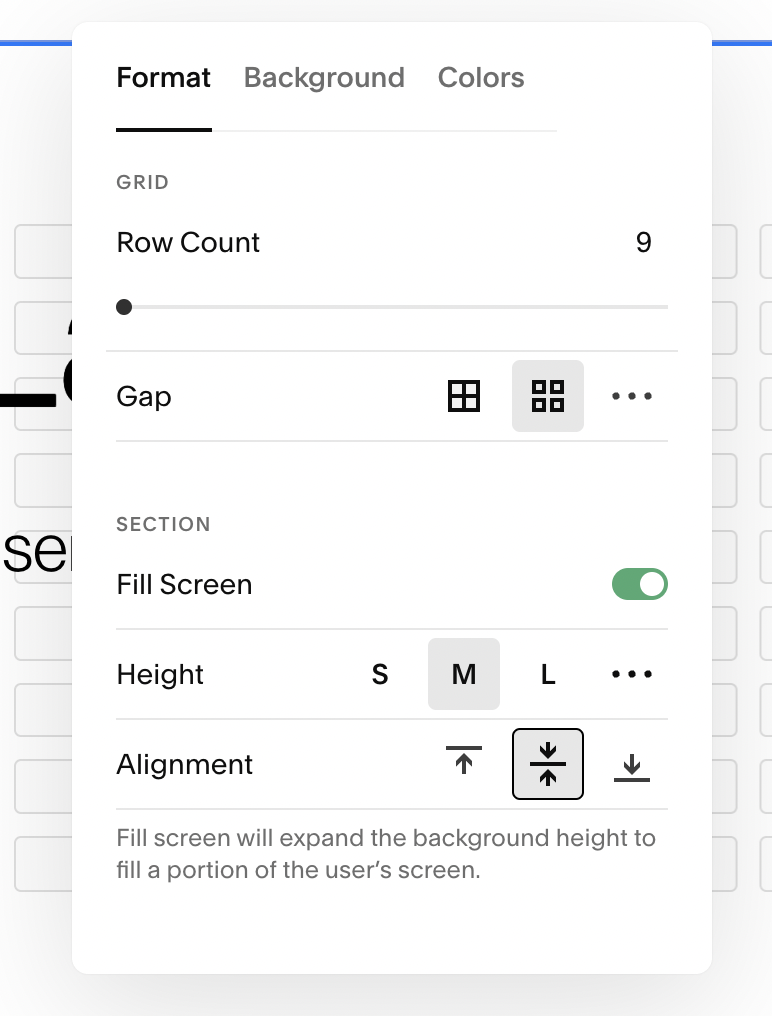
Row Count
Gap
Height
Alignment
Viewport
How to add blocks to Fluid Engine sections
Mouse over to the top left corner of a section and click “+ Add Block”
How to align and overlap blocks
After you move a block to a new place in Fluid Engine, the block's toolbar appears.
To align the content of the block horizontally, vertically, or both within the borders of the block, click the alignment icons in the block's toolbar. Note that image blocks and button blocks set to fill, don't have alignment options.
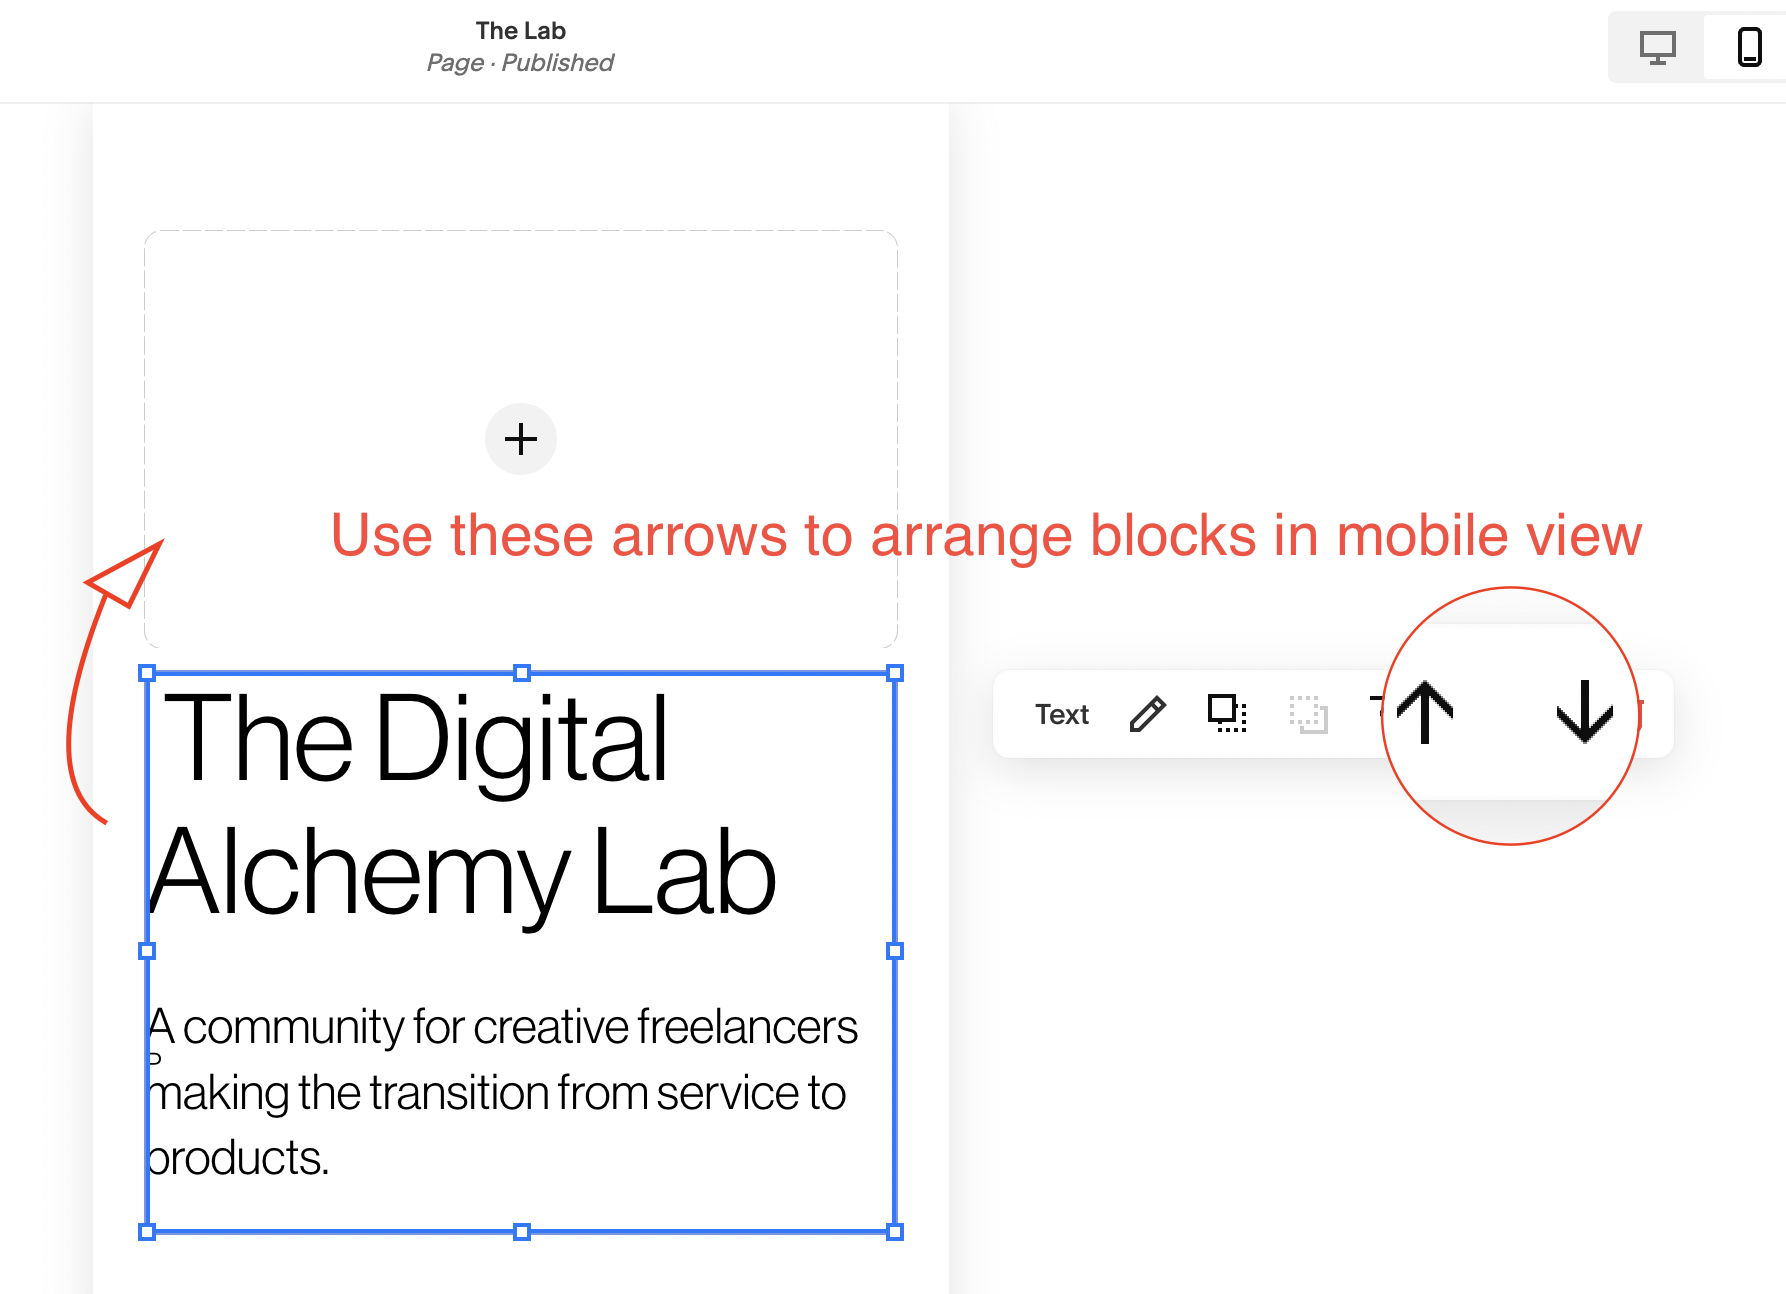
When blocks overlap, the toolbar displays Move Forward and Move Backward icons, so you can set which block appears on top. When many blocks overlap, you may have to click multiple times to bring the block all the way forward or back.
To help make block content more visible on overlapping blocks, add background colors to certain blocks.
How to move multiple blocks at the same time
Click and drag in the section background to highlight the blocks.
Click one of the blocks and drag. This moves all of the highlighted blocks at the same time, preserving their current layout.
How to add padding to button blocks
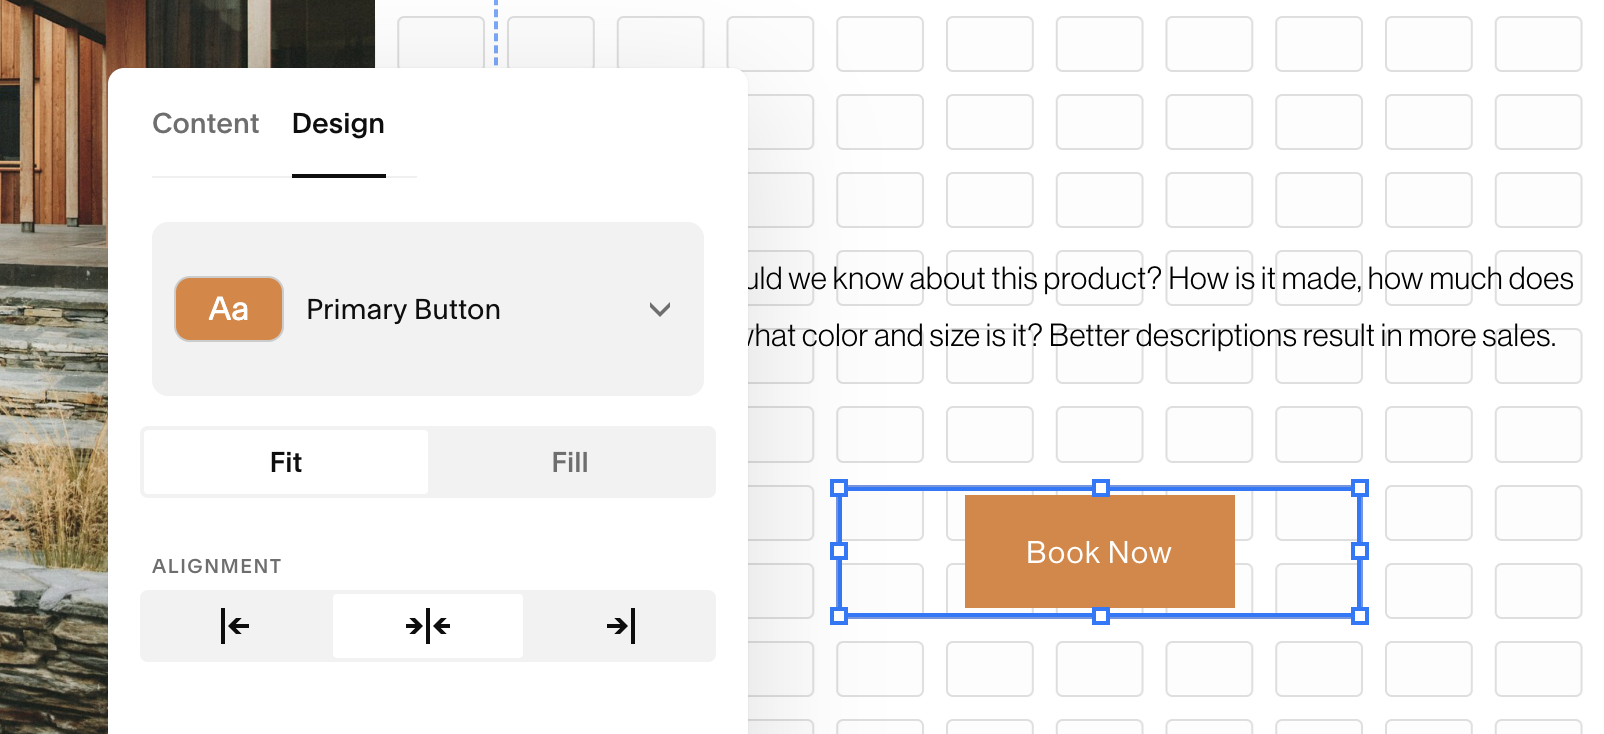

When set to fill the button block styles are the same as the default button styles in the site style settings.
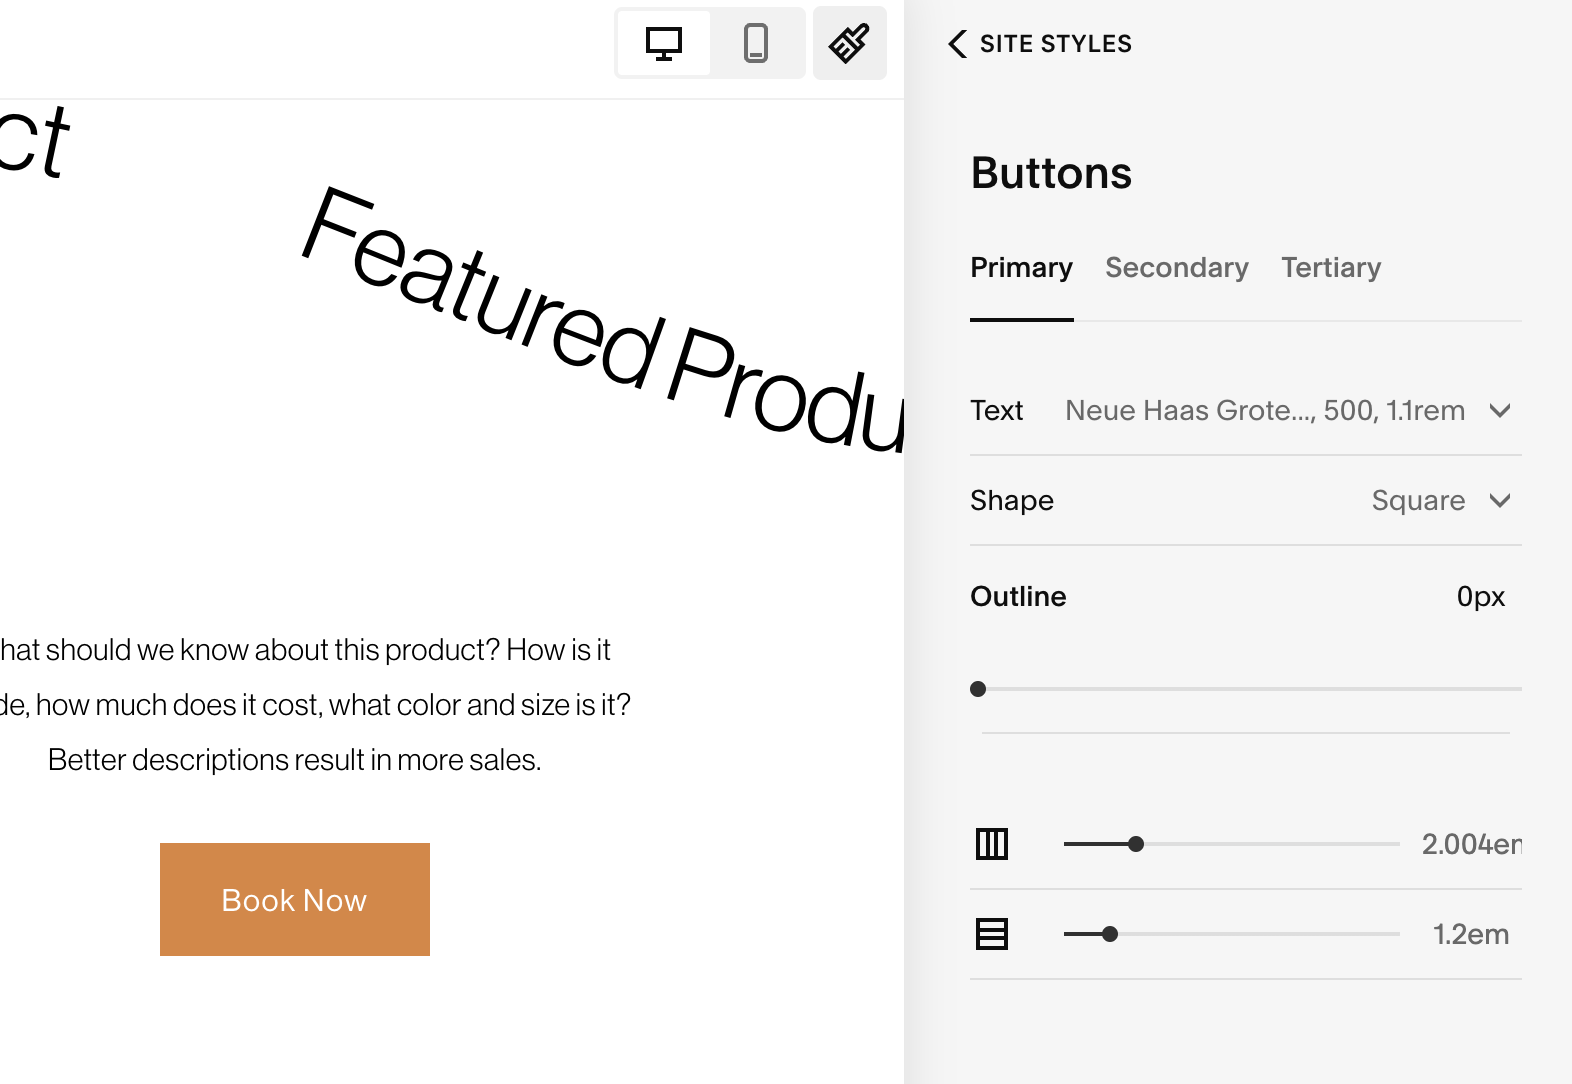
Should I upgrade to Fluid Engine?
Some experts advise waiting for the bugs to be worked out. Others encourage you to jump in and learn. To me it’s whatever you’re comfortable with. Eventually, all Squarespace websites will have Fluid Engine enabled so it’s worth learning and getting used to.
How to upgrade to a classic editor section to Fluid Engine

Navigate to a page section and convert to fluid engine by clicking the Upgrade button in the top left corner.
How do I turn off Fluid Engine?
You can’t turn off Fluid Engine once you’ve upgraded your sections. The only way is to have a Circle Member enable it on your site. However you can keep using existing Classic Editor options, just make sure you don’t click upgrade!
How to keep using the Squarespace Classic Editor

If you’re not ready to use Fluid Engine or you prefer the Classic Editor, there are a few ways to keep using it.
When you add a new page, go to page layouts and scroll down to the bottom of the catalog. You’ll see an option for designs built with the Classic Editor.
You can also get to the same option by adding a page section and scrolling down the section layout menu.
You can also duplicate pages or sections created with Classic Editor.
What happens when you convert a section to Fluid Engine?
You might see a slight shift as the elements adjust to the Fluid Engine grid.
How to edit the your mobile layout
To edit your mobile site, navigate to the mobile icon in the upper right corner of your screen.
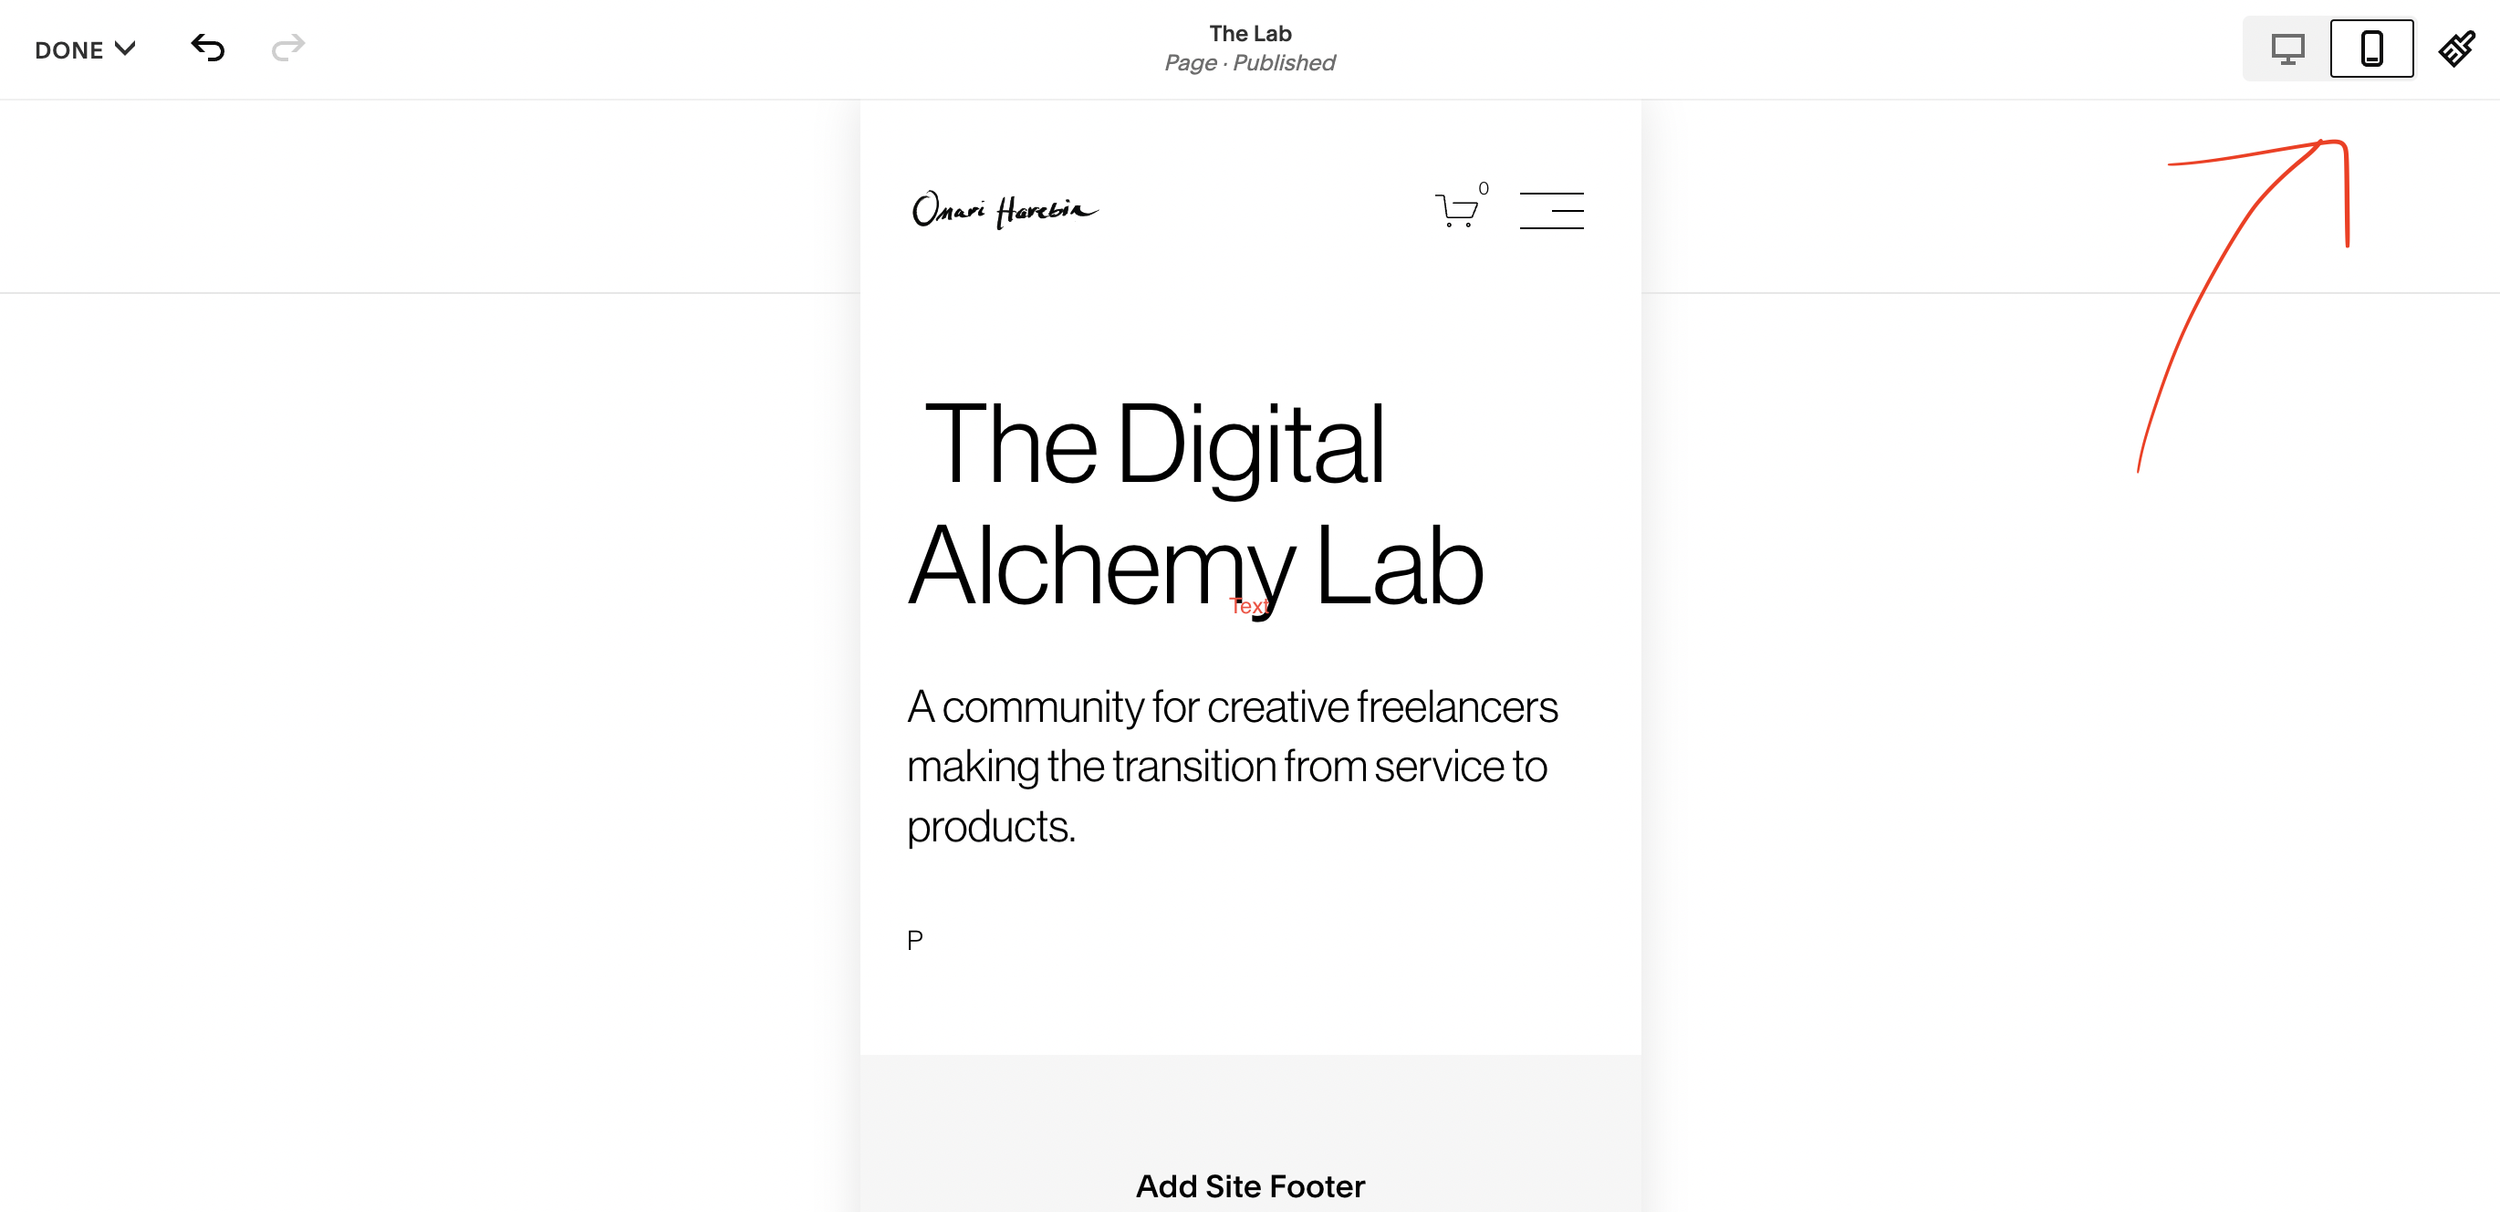
Note: You cannot add blocks in mobile layout mode.
To arrange blocks, click on a block and use the arrows to move them up and down.
How to style Fluid Engine sections
Editing the Section Format
You can change the format of the grid. This includes the gaps, number of rows, and padding around the section.
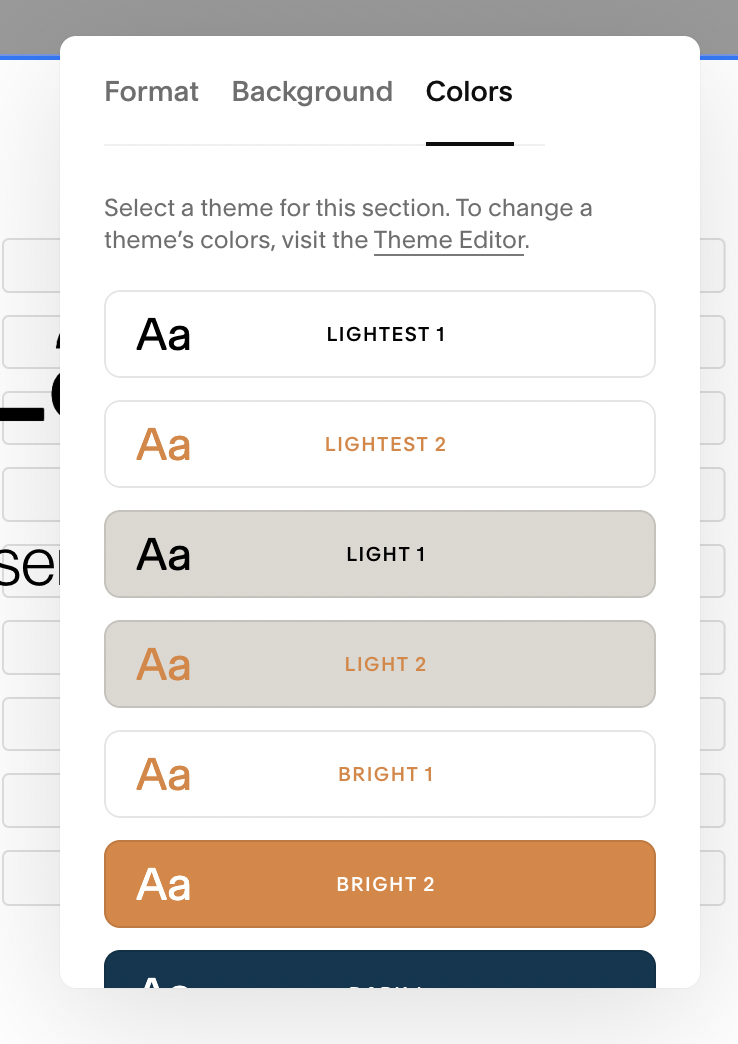
You can also edit the section background and color theme like you would with the 7.1 classic editor.

Frequently Asked Questions
I like the spacing consistency of the classic editor. How do I get things to have those clean lines like before?
To create consistent spacing with Fluid Engine you'll adjust the gap in the Format tab. This will allow you to control the spacing between blocks in these sections.
Do 3rd party Squarespace templates work with Fluid Engine?
Yes. Check with the designer first to be sure but most are built with fluid engine in mind.
How to control the order of blocks on mobile?
Blocks are added in mobile in the same order they are added on desktop.
How to optimize the tablet view?
Currently there’s no way to optimize the tablet view.
How does Fluid Engine affect accessibility and SEO
Fluid Engine prioritizes the block order from mobile.
How to get help with Squarespace Fluid Engine?
Want to learn more?
Check out this upcoming workshop from Inside the Square.